Sunday, April 25, 2010

Bug Card Swap

Last week, I completed a swap over at CardMaker that required you use a bug on your card. Worked out perfect for me because I had seen this cute little "cooties" stamp at Michael's the week before. Initally, I resisted the urge to purchase. Well, that didn't work out well. After I saw the post for the swap, I ran to Michael's the very next day over lunch!! Anyway, I had to make the card above because I ran out of paper... oops after making the ones below.... which are my hands-down favorite!!
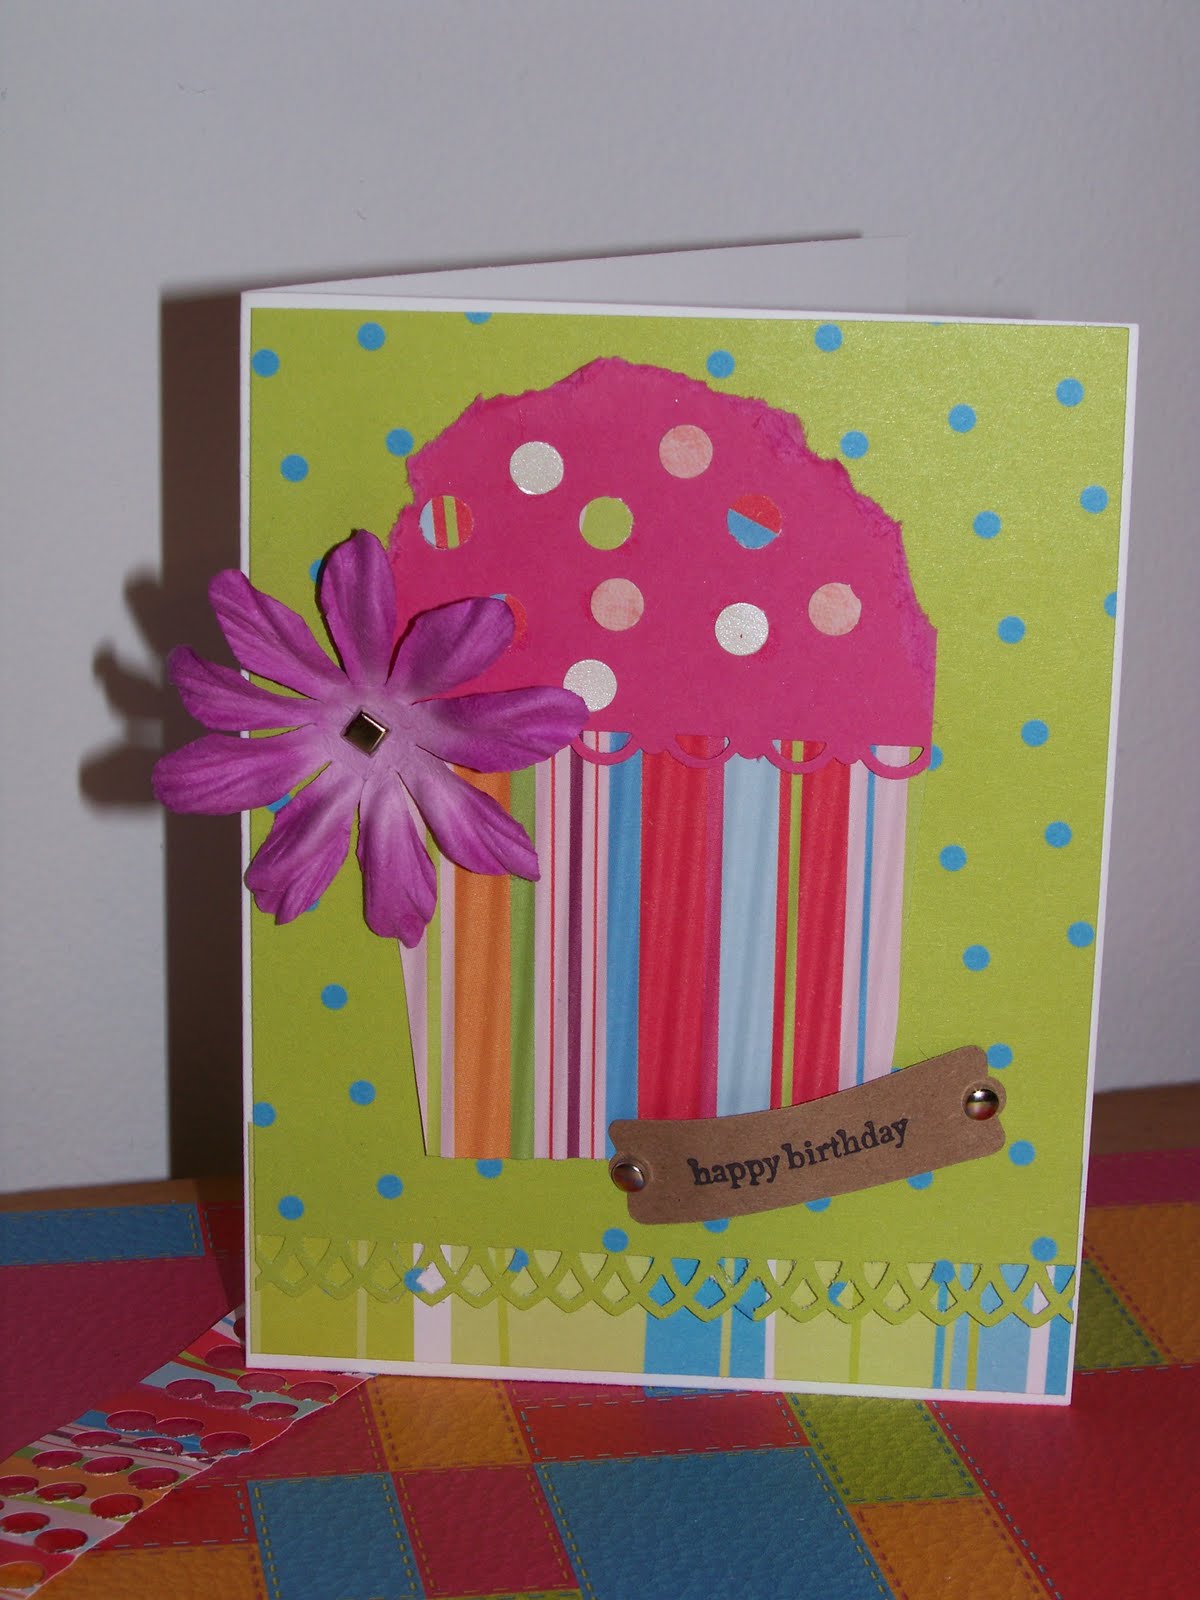
I ran the striped paper through my paper crimper and pop-doted up the top oval.


I colored the bugs just a bit and there's one of those snazzy border punches!!!


A special thanks to my good friend, Lora for letting me use her punches for the ovals and scallop ovals.

So, I am trying to get better with using my camera settings...


So I took a bazillion picutres and decided to share them with you! Lucky you!!


**If you are still reading, leave a comment so I know you were here!

Tuesday, April 20, 2010

I've been quoted!!!

I knew my "two sence" would serve me someday! I follow a great thrifty decorator/DIY/randomness blog titled 320 Sycamore and I just LOVE it. Anyway, she had this poll going about this purse... I happen to love purses. Did you know I have an entire closet devoted to shoes and purses?? Well I do and it's bliss!!

Anyway, I am excited... you can see what I had to say here: Nurse Purse. Look towards the bottom. (Here's how I was quoted: “I think if you add a fresh (read thin and springy) scarf... tied around the strap near where it attaches to the bag, you can TOTALLY ROCK IT!!!”

Thanks Melissa for my 2 seconds of fame. :)

Monday, April 19, 2010

Why of course it's Rich Razzleberry!

Last week I was the Sketh Hostess at CardMaker. Here's my sketch: I had a moderately crappy week so it was hand drawn (I prefer to label it as an original pencil sketch) and it looks like I didn't rotate it correctly either...

Here's my example. I used Rich Razzleberry ink and some coordinating Designer paper from SU. I made the flower using the George cartidge on my Cricut. The bottom flower layer is plain Very Vanilla cardstock, next layer is VV again with a random pattern from a new $1 stamp. Then, the top is Designer Paper.

I took this side angle shot so you could see that I scrunched (ok, I really just wadded) up the flower layers and set the sentiment so that I had some extra dimension to my card... pretty cute if you ask me. See that darling scallopped border?? You know it's a new border punch! I am simply addicted to those things!!

Monday, April 12, 2010

Cupcakes O' Plenty!

I made a pack of cupcake "Happy Birthday" cards for a swap I joined at CardMakerMagazine.com. The challenge was to make 6 birthday cards; they had to have a cupcake of some kind.

I love these colors together... pretty "loud" but birthdays should be LOUD, don't you think?
Supplies:
Paper: from my stash
Stamp: Teeny Tiny Wishes
Punches: Modern Label, Lattice Border Punch
Other: Prima flowers, brands (from my stash)

Miss Irene... She is beautiful!!

A little background information: Aunt Irene was my great Aunt (Steve's Dad, Leroy's sister). She moved from St. Louis to live next to my parents after I moved away to college. She had buckets and buckets (literally 5 gallon buckets) of cool jewelry, neat-o dishes, LOADS of hankies (the frilly kind) and some incredibly fancy pieces of furniture....Aunt Irene passed away several years ago and Grandpa Leroy let us keep most anything we wanted. I have loads of darling little hankies, tons of broaches (I modified some plain old Christmas stockings to be the coolest vintage socks ever!!) some funky vintage jewelry and now, this beaut! Mom kept this piece that I will call "Miss Irene". I begged for years and she always said 'no, that piece is mine; we can find you one someday'. Well.... before I went home for Easter, Mom called and said: "Why don't you drive the SUV so you can take that cabinet home with you." WWWWHHHHHAAAAAATTTTTTT!!!!!!!!! I say??
Well, long story short, I go to pick it up, the finish on the top was messed up from moisture I presume... not sure how. So, I went back this weekend and we stripped it!! I have to admit; I am hooked!! I love refinishing furniture!
My pretty Mom taking out the shelves. Just look at Miss Irene! You think she's pretty here, just wait!

Safety first!! Can you tell it was a warm Sunday in the Midwest? I think it was in the upper 70's; great afternoon to spend in the garage hard at work!

Steve! He had to repair the quarter-round holding the left side glass; the glass was held in with ancient brown duct tape (who knew that colored duct tape wasn't really a new invention!).
(Side Note: see that mirror in the background, over my left shoulder? I drug it home from a yard sale in high school. Mom hates it; I think she kept it because deep down, she knew that I was a junker before junking was cool!)

This is a spoiler for Miss Irene in all her finished beauty! Wow!!
*I liked this project up to YardSale Finds on Southern Hospitality. Check out the other submissions!

Blinds and my first EVER furniture/decor restoration!!

Here's the before picture... just ignore the random things in the bay window.
Side Note: When JJ and I first started dating his blinds were plastic minis in really bad shape. I recommended he get some new... I said "should be cheap, just a few bucks for the little windonws and ... I don't know... maybe$20 for the middle". So off he goes. On my next visit, I notice that he purchased METAL minis and he announces to me that they were not cheap!
Long story short: I have hated them since day 1 but they were already installed, expensive and from guy-view... he just couldn't understand my problem... "they are just blinds Sugar". So, until I finished graduate school and we payed for our wedding, I certainly couldn't afford new ones >>>>>>> fast forward to now!!
I got these beauties at Home Depot ~20 bucks for the side windows, ~$45 for the middle window... not exactly cheap but MUCH better than the old metals that marked up my newly painted walls (can you tell I hated the metals from hello??)

BTW-- Did you notice the photo in the above pic? It's one of my favorites from our wedding... I just pack it around the house... it changes locations about once a week. LOVE IT!!!
2 windows down... and I adjusted the length too (quite the pain!)

All done... I love them already. I just have to figure out what to do with my bay window sitting area. Any ideas??

I wanted to show you this piece above the windows. It's the first piece of furniture I re-did. I purchased it at an estate auction (I think it was the topper to a fancy organ... who knows what happened to the organ... it was sticking in the dirt when I rescued it!) several years ago and refinished it right away! JJ always hated it but I convinced him we should give it a chance... now he loves it too!! (Please ignore the popcorn ceiling... Rome wasn't built in a day people!)

Sunday, April 11, 2010

Happy Easter Inchies!!

For Easter, I gave my Grandma the charm pictured below; it holds 1"x1" pieces of paper or things or... whatever you want to add.

(NOTE: I didn't take this picture, I borrowed it from the SU website. I hope I don't get arrested!)

So, these are the inchies I made for her. (Sorry I forgot to flip this one.)

This is my Buuterflies and Birds stamp set again with that lovely Rich Razzleberry ink... Did you hear?? Rich Razzleberry made it into the "normal" color line of SU inks! *swoon* I also colored the back inchie with my new glitter pen from my friend Barbara... thanks BB!
Now, I made the top one... pretty basic but I love it because I got to glitter it with my new glitter pen. The bottom one was made by Jane; I got it from an inchie swap I did over at CardMaker. I gave it to my Grandma because I thougth she would love it... she did!! Thanks Jane!!


Now these... Grandma and I both LOVE LOVE Christmas and of course, glitter!! So I knew she would love these! I used my Delightful Decorations set for the first two, and an old Creative Memories punch for the third one. The last one is just my writting. I also sprayed those last two with Tattered Angels Glimmer Mist in Marshmellow... I love that stuff!!


*Sorry these photos are so horrible. I didn't realize until now and the inchies have been gifted.*
This is hands down, my favorite set!! They are really pretty purples with a Chocolate Chip, embossed "U". This was left over paper from my bucket reformation; love it!!
I just love this little owl from my Butterflies and Birds set (do I sound like a broken record??). This paper is super gorge too! It's 'That's Amore' from Close to my Heart. The word is just my handwritting (I have to say that I am not super impressed with my penmanship but others seem to enjoy it on occasion so...). Oh, and if you look close, there's more glitter pen on the owl!


Grandma loved them!! She also had this really cool, vintage necklace that had tons of layers of silver strands. It was perfect!! I am ashamed to say that I didn't snap a picture of her on Easter morning... I don't even take my camera--- Eek!! I will snag a picture soon. With this many inchies, I am sure she will sport it often AND-- I will make her some more as the ideas come to me.

Wednesday, April 7, 2010

Peones and a Princess

I just had to post this picture!! I am just dying for my peonies to begin blooming this year (This picture is from last spring). So far this year, they are about a foot tall; that has all happened since Easter weekend! I have three peony bushes but this is my oldest one. I got it from my Mom for Easter several years ago; I just love it!! My sweet Lucy gets her picture taken quite frequently; she's pretty good at posing!

Tuesday, April 6, 2010

Medallion Stamp ~ I am in LOVE!!

This is a relatively new stamp for me and I must say... I LOVE it! There's that Chocolate Chip and Real Red again!

And, you know that's my favorite wedding ribbon!!